Friday, March 23, 2012

How-To: Hunger Games Mockingjay T-Shirt with Freezer Paper Stencil and Bleach Pen

How-To: Hunger Games Mocking Jay Bleach Pen Freezer Paper Stencil T-Shirt 
I have to admit that I was late to The Hunger Games party. Friends had been reading the books for years, but I've had my head stuck in non-fiction space books for so long, fiction just passed right by me. My 11-year-old daughter started begging to read the trilogy, and I decided that - based on what I'd heard about the violence in the book - I needed to read them with her so I could make sure it was appropriate for her.

I read the first book in less than 24 hours.

That week, aside from the normal work and family tasks, I luxuriated in devouring the whole trilogy. Reading a good book is absolutely blissful, and I loved how this story sucked me right in and wouldn't let go until I turned the very last page of Mockingjay.

My daughter also devoured The Hunger Games (though she's going through Catching Fire more slowly) and we have had so much fun discussing the books. We fight over the whole Team Peeta/Team Gale thing, talk about how Katniss' awesomeness knows now bounds, and discuss if she thinks something like this could ever happen in real life. It's been a wonderful way to connect with each other, and if you are a parent to a pre-teen ... you know how much it means to find something to connect with.

We have our tickets to see the movie tonight, and have a whole date night planned. She mentioned wanting a shirt, but of course I thought, "Why buy when I can DIY?" I posted a Hunger Games craft roundup on CRAFT last week, and one of the projects included a template for the Mockingjay pin. I decided a simple bleach pen/freezer paper stencil on black t-shirts would be easy and would give us that gritty Hunger Games feel.

We may look like total nerds wearing mother/daughter Hunger Games t-shirts, but if she's game for it, I will not pass up the opportunity. Who knows when she'll be willing to do this ever again!

Bleach pen/freezer paper stencils are insanely easy, quick and inexpensive. Here's all you need to make your own Mockingjay t-shirt to wear to the movie this weekend. Once you have the supplies on hand, you can easily be done with your shirt in 30-40 minutes.
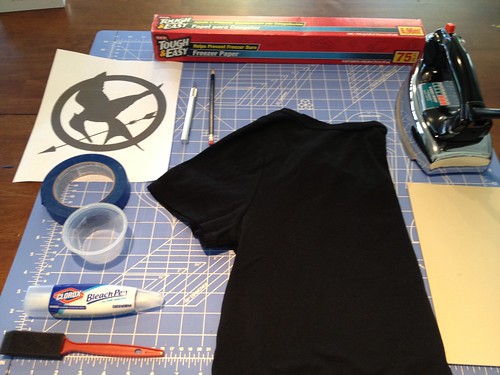
How-To: Hunger Games Mocking Jay Bleach Pen Freezer Paper Stencil T-Shirt
Materials:
  • Black T-shirt 
  • Bleach Pen 
  • Small Sponge Brush 
  • Freezer Paper 
  • Mockingjay Template (available here from Forever Young Adult)
  • X-acto knife 
  • Iron
  • Scrap piece of cardboard 
  • Pencil 
  • Tape
  • Small container or dish you don't care about 
  • self-healing cutting mat 

How-To: Hunger Games Mocking Jay Bleach Pen Freezer Paper Stencil T-Shirt

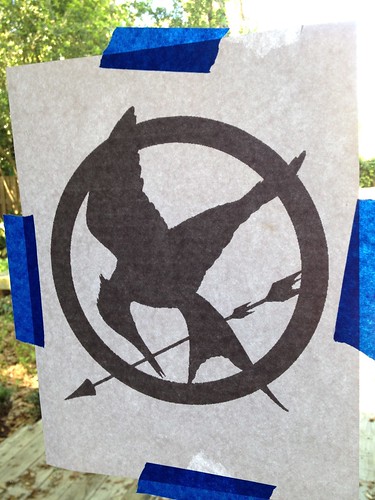
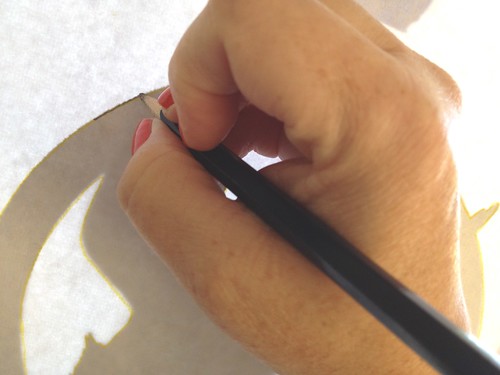
Step One: Print the Mockingjay template available at Forever Young Adult (if you are interested in screen printing instead of freezer paper stenciling, they have a great tutorial!) Tape the printout on to a sunny window (or a lightbox, if you're lucky enough to have one!) Then tape a large piece of freezer paper, shiny side down, on top of the printout.*
How-To: Hunger Games Mocking Jay Bleach Pen Freezer Paper Stencil T-Shirt

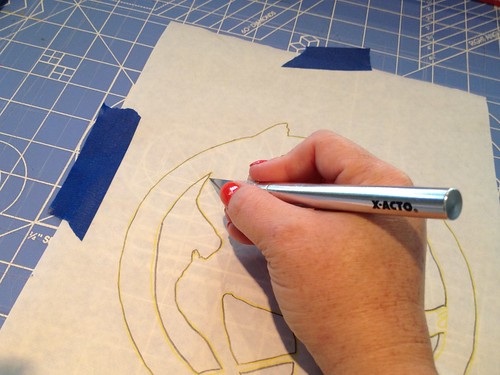
Step Two: Use a pencil to trace the Mockingjay design on to the rough side of the freezer paper. 
How-To: Hunger Games Mocking Jay Bleach Pen Freezer Paper Stencil T-Shirt
hunger_games_freezer_paper_pieces_cut_out.jpg

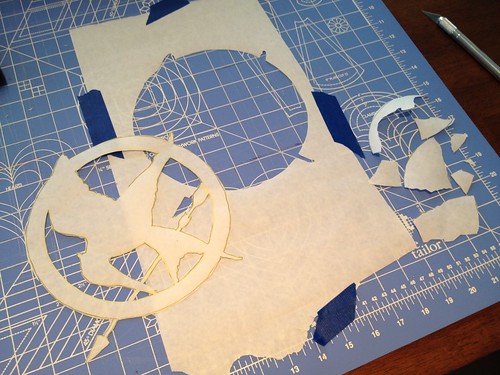
Step Three: Remove the freezer paper from the window and place it on a self-healing cutting mat (a piece of cardboard will work in a pinch. You just want to protect the surface on which you are cutting) Carefully cut out all the inside pieces of the Mockingjay design that you will want to keep black in your design. Then cut out on the outside line of the circle/arrow. Be sure to keep the outer large piece of the freezer paper in tact. SAVE all the small inside pieces. You'll need them for the stenciling. 
IMG_5997.JPG

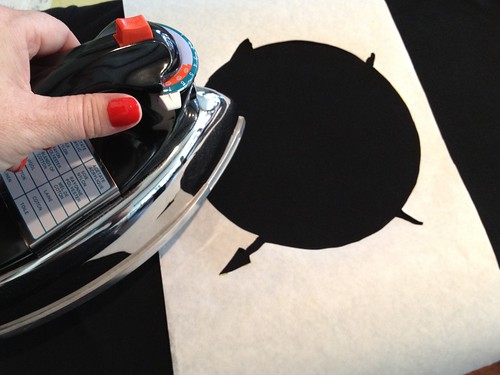
Step Four: Iron the large outer pice of freezer paper on to your shirt where you want the design to go. Use a hot, dry iron and press well. the paper gets a little wobbly-looking. That's ok. 
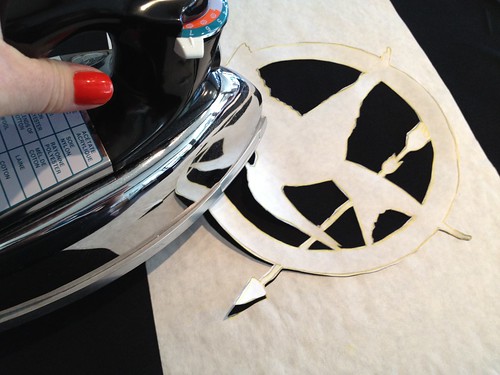
How-To: Hunger Games Mocking Jay Bleach Pen Freezer Paper Stencil T-Shirt

Step Five: Place the Mockingjay portion of the cutout carefully in place inside the circle and press down. 
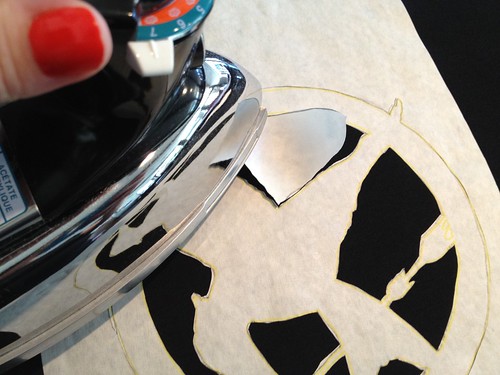
How-To: Hunger Games Mocking Jay Bleach Pen Freezer Paper Stencil T-Shirt

Step Six: Take all the small inside pieces and iron them in to place. Things can get a bit fiddly at this point, but keep in mind: it doesn't have to be perfect. 
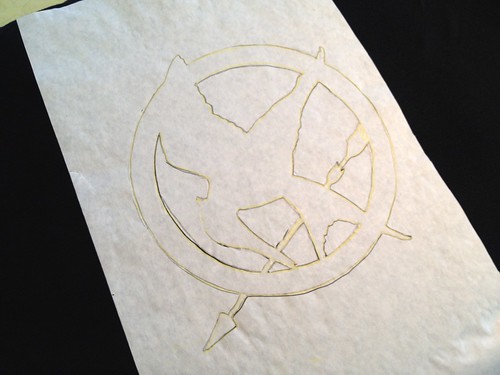
How-To: Hunger Games Mocking Jay Bleach Pen Freezer Paper Stencil T-Shirt How-To: Hunger Games Mocking Jay Bleach Pen Freezer Paper Stencil T-Shirt How-To: Hunger Games Mocking Jay Bleach Pen Freezer Paper Stencil T-Shirt
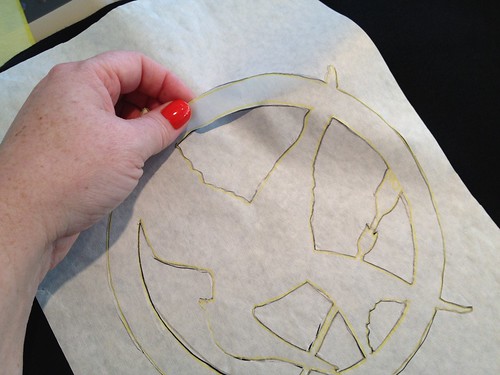
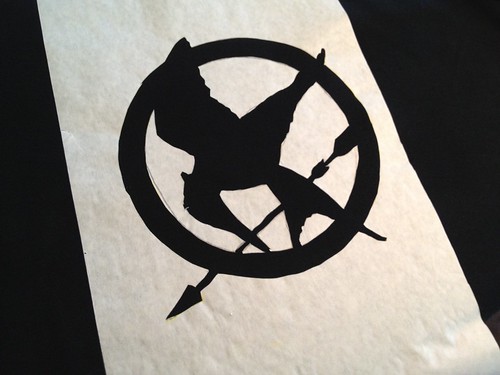
Step Seven: Once all the pieces of the freezer paper are down, it's time to remove the pieces you want to bleach (thank you to my pal, Kathie, for this easy tip on getting the reverse of the design to work!) Carefully peel back the pieces of the Mockingjay pin portion of the design, leaving you with the large outer piece and all the small inside pieces. 
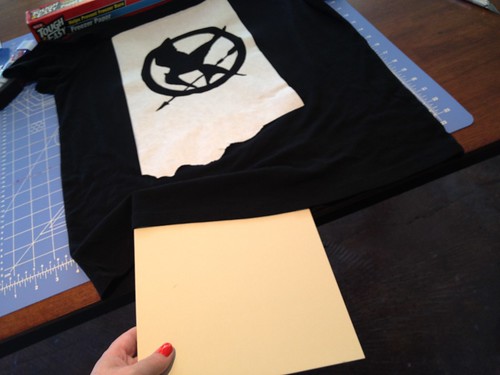
How-To: Hunger Games Mocking Jay Bleach Pen Freezer Paper Stencil T-Shirt

Step Eight: Slide a piece of scrap cardboard inside your shirt to prevent the bleach from bleeding through to the back. 
How-To: Hunger Games Mocking Jay Bleach Pen Freezer Paper Stencil T-Shirt

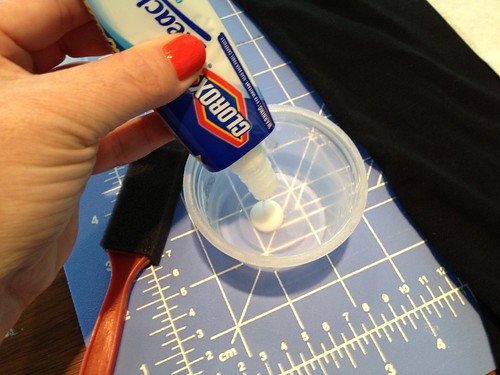
Step Nine: You can either use the bleach pen directly on your shirt, or with a sponge brush. I prefer the latter method. Squeeze some of the bleach gel out in to an old container. (I keep a stash of yogurt and applesauce containers around for this very use) 
How-To: Hunger Games Mocking Jay Bleach Pen Freezer Paper Stencil T-Shirt

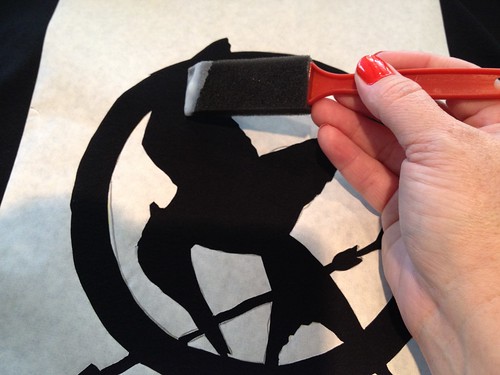
Step Ten: Use a small foam sponge brush to paint the gel on to the t-shirt inside your design. 
How-To: Hunger Games Mocking Jay Bleach Pen Freezer Paper Stencil T-Shirt

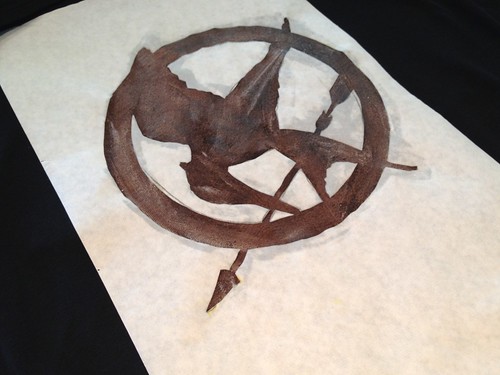
Step Eleven: Make sure the design is fully coated and let it sit for a few minutes. You'll see it start to change colors. I'd say anywhere from 5-8 minutes is good enough to bleach it out, but not so long that it will severely damage the fabric. Be sure to keep an eye on it and judge based on your own shirt. 
How-To: Hunger Games Mocking Jay Bleach Pen Freezer Paper Stencil T-Shirt

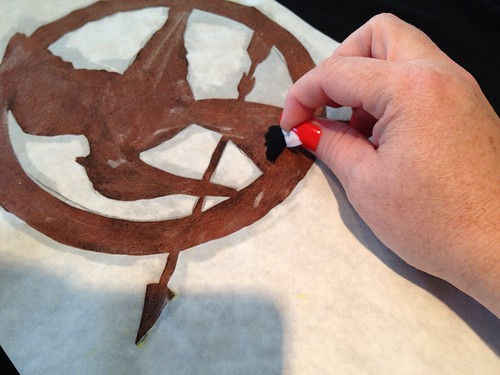
Step Twelve: Very carefully peel back the pieces of the freezer paper, starting with the small inside pieces. Be sure to not allow the shirt to pull up and fold back on itself, causing the bleach gel to transfer to other parts of the shirt. 
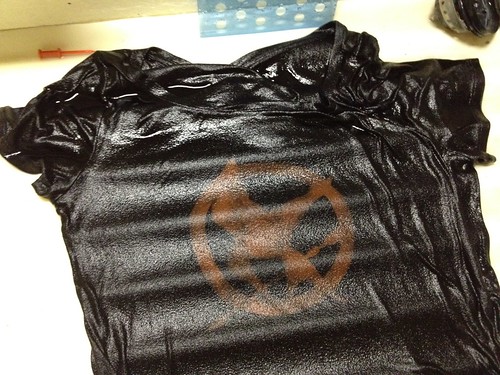
How-To: Hunger Games Mocking Jay Bleach Pen Freezer Paper Stencil T-Shirt
this is in my big studio sink that has a corrugated liner :) 

Step Thirteen: Immediately rinse the t-shirt in the sink to stop the bleaching process. Squeeze it out and then wash it in the washing machine and you're ready to wear it to see the movie! 

How-To: Hunger Games Mocking Jay Bleach Pen Freezer Paper Stencil T-Shirt
This is such a quick, easy and accessible project, and the method can be applied to any design. Give it a try and let me know how it goes! 

Tuesday, December 20, 2011

My Kooky Christmas Headband


Holiday cheers to you! Last week, my husband and I were invited to a small cocktail party in our neighborhood. Tacky Christmas attire (give it up for crazy Christmas sweaters!) was encouraged. I didn't have any crazy Christmas sweaters, but decided to whip up a kooky little headband to wear instead. 

It came together so easily, I didn't even think to take step-by-step pictures, but I'll share how I made it below. I was tweeting the progress, so all I've got are some quickie iPhone & Photo Booth pics, but you'll get the idea. It took literally maybe 15 minutes from start to finish, and was a big hit at the party. I may have gone a little overboard and also fashioned a matching ring and set of gift wrap bow brooches to complete the accessory set as well ... What can I say? I hadn't played with a glue gun in a while, and I forgot how easily and quickly hot glue projects come together. 

Headband: 
- 1 wide headband (I picked a cheap one up at a local drugstore) 
- Martha Stewart Glitter Eyelash Yarn from Lion Brand Yarn (I got mine from my Whimseybox
- A set of miniature Christmas trees (I got a pack of about 7 at Michael's last week. They were on sale 50% off and ended up being just about a dollar for the bag) 
- Small jingle bells 
- hot glue

- Wrap the headband in the glitter eyelash yarn. I left a tail at the beginning and just wrapped around it to secure it. I left about 3 inches just off center for the trees to be mounted. I secured the yarn at the end with a dab of hot glue.*
- Decide how you want to arrange your trees on the headband before you start gluing. Add a dollop of hot glue to the base of each tree and stick 'em on the headband. I ended up putting glue on the bottom and back side of a small tree or two to "nestle" them into the bigger trees. 
- Use small dollops of hot glue to secure the jingle bells across the front to hide the massive amounts of hot glue used to add the trees. You're done! 


Ring
- Ring base (similar to this)
- small tree
- sequins 
- Aileen's tacky glue 
- Martha Stewart Glitter Eyelash Yarn
- hot glue 

- Use the tacky glue to add sequin "ornaments" to the tree. 
- put a dollop of hot glue on the base of the tree and stick it on the ring base
- Add a small piece of the eyelash yarn around the base of the tree 


Mini bow buttons 
- mini gift bows (I found mine at a drugstore) 
- 1" buttons (I had a ton from various events) 
- hot glue 
- jingle bells 
- small Christmas tree 

- I wanted to come up with a gift bow brooch, but didn't have any blanks to use. I spied a little bowl of 1" buttons I'd collected at various events over the years and a light went off in my head. I grabbed a few and just hot glued the bows to the button fronts. 
- I also put a bunch of hot glue on the back of a tree and smooshed it into one of the gift bows and then glued a few jingle bells on to the front. I pinned them on to my dress in a group and made a festive little bow "corsage." 

And, because you stuck with me through all the poorly-lit/focused pictures: an action shot! 


Happy Holidays, y'all! :) 

* A word of warning: when gluing the yarn to the headband, be sure you let it dry before you try it on. Hot glue is hard to get out of your hair. Not that I know anything about that. 

Wednesday, November 9, 2011

Fabric of the Cosmos Skirt

Images from PBS.org

We've been watching the Brian Greene, Fabric of the Cosmos, series on NOVA lately and have been completely fascinated. It's mind-blowing in the best way, and I want to watch episodes over and over again just to soak it all in. If you haven't watched it yet, I highly recommend checking out the PBS web site to watch online.

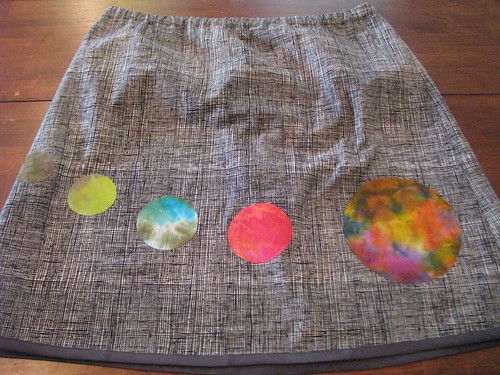
Fabric of the Cosmos Skirt - front

Of course, as he talks about the "Fabric" of the Cosmos, my brain instantly goes to textiles. I have some ideas for bigger, more complex projects on this subject, but was in need of some instant-ish gratification this week and decided to do a simple skirt to scratch the itch.

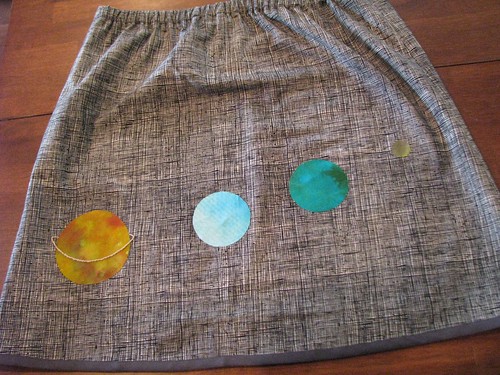
Fabric of the Cosmos Skirt - Back

This was one of those projects that comes together so seamlessly (pun intended) that you know it was meant to be. As soon as the idea popped in to my head, I could instantly put my hands on just about every material I'd need for the project and it came together very quickly.

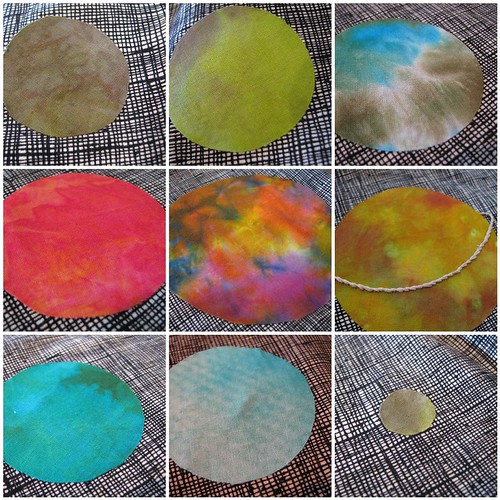
Fabric of the Cosmos Skirt - Planets

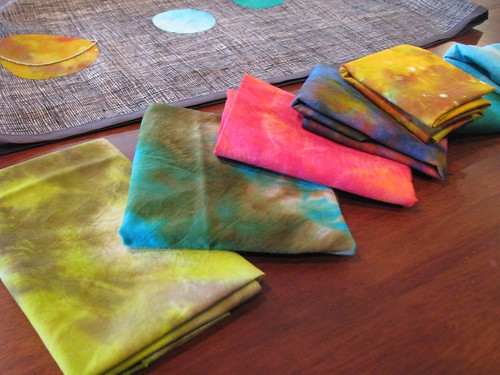
For the base of the skirt, I wanted a fabric that resembles the weave used in the graphics in the Fabric of the Cosmos show. I happened to have this awesome Alexander Henry fabric that I got at the Stitch Lab ages ago that was perfect. It's a yummy, heavy fabric with a great cross-hatch print. From there, I pulled out my stash of hand-dyed fat quarters that I made in my surface design class with Kat. I was able to find pieces that resembled each planet (ok, ok, Jupiter is a tad ... psychedelic, but it works!) and did a quick applique. I embroidered the rings of Saturn, but getting the needle through the heavy fabric and the fusible webbing proved much tougher than I'd anticipated. Instead of stitching many rings, my fingers could only stand to stitch one.

Fabric of the Cosmos Skirt - with hand-dyed fabrics

I've lost count of how many of these simple, elastic-waist skirts from my Beginning I sewing class at the Stitch Lab I've made. My pattern from the class is starting to show its age, and needs to be re-drawn before I lose it completely. I love how easy it is to create a fun piece of clothing to wear. I may not have the sexiest wardrobe on the planet, but it is fun and personalized. I wear one of these skirts almost every single day, and I'm glad to have this latest geeky one to add to the rotation.

Tuesday, November 8, 2011

Vintage Embroidery & Craft Goodies

Over the years, I've built up a nice stash of vintage craft books and magazines. I have a very hard time resisting them when I find them at garage sales and estate sales. I also have a severe weakness for vintage embroidery, crewel and cross-stitch kits and pieces. I've been meaning to share them here on the blog, and was even more motivated after a visit from Diane and Kristin a couple of weeks ago. Having a great stash of vintage craft magazines is fun and all, but it's fun times ten when you get to sit with some of you best crafty pals and read through them together.

Diane already posted about some of the needlework magazines, so I thought I'd share a couple of posts about a particularly awesome book of embroidery transfers I picked up at an estate sale, as well as some other vintage needlework magazines and some of the vintage stationery I've collected as well. Let's kick it off with the embroidery book, shall we?

Estate Sale find - embroidery transfer book

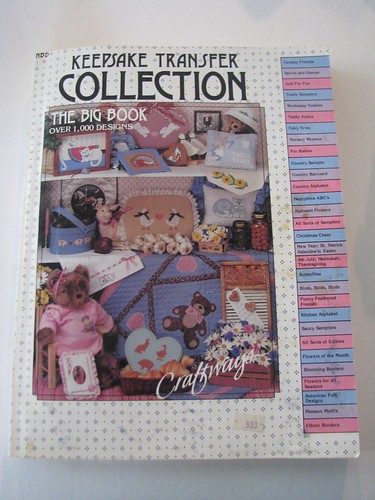
My daughter actually found this book for me while we were at an estate sale recently. Initially, I almost didn't even thumb through it. It's a thick book of embroidery transfers, but the cover was a little too country kitchen for my taste, and I figured everything inside would be the same. I'm so glad I decided to actually look through it, because while there is a healthy dose of country geese inside, there are also dozens of kooky and cool designs.

The book is called the Keepsake Transfer Collection and boasts more than 1,000 iron on designs. And they aren't kidding - there are loads of great, unique images in this book - not just repeats of things that are slightly modified. You can find it on Amazon used here.

Here are some of my favorites from the book. You can see more over on my Flickr set.

Estate Sale find - embroidery transfer book

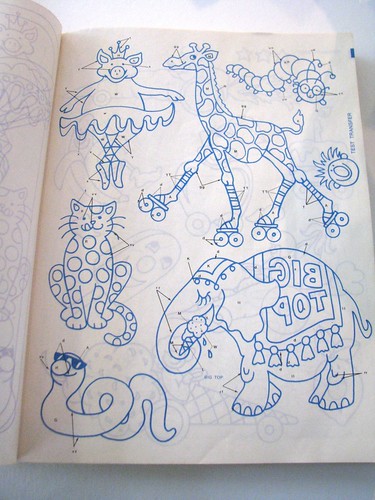
There's a whole lot of win on this page. Giraffe on roller skates? Yes, please! I also love the wacky guy who serves as the test transfer.

  Estate Sale find - embroidery transfer book

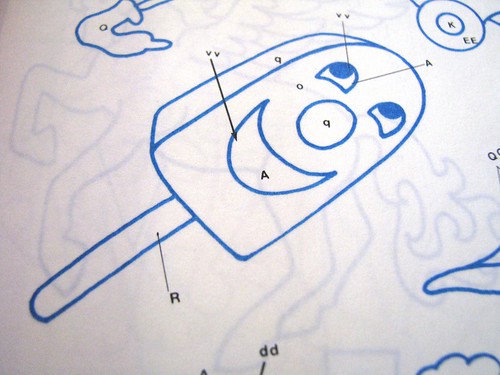
Some designs are highly complex, while others are charmingly simple. I love this little popsicle dude.

Estate Sale find - embroidery transfer book

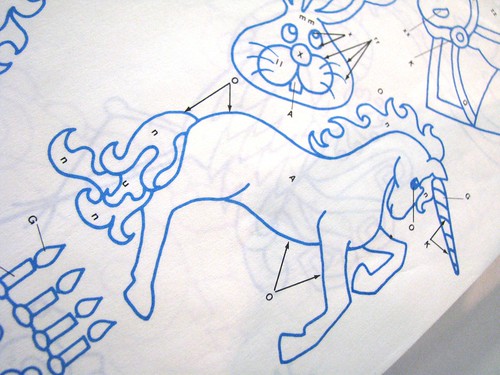
The book is from the mid-80s (wait, can it still classify as "vintage?") so you know there are unicorns.

Estate Sale find - embroidery transfer book

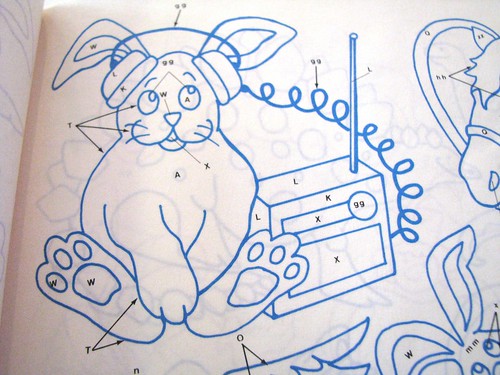
What up, bunny with a boom box!? Wait ... what's he doing with his other paw there ... ehhhnnn ...

Estate Sale find - embroidery transfer book

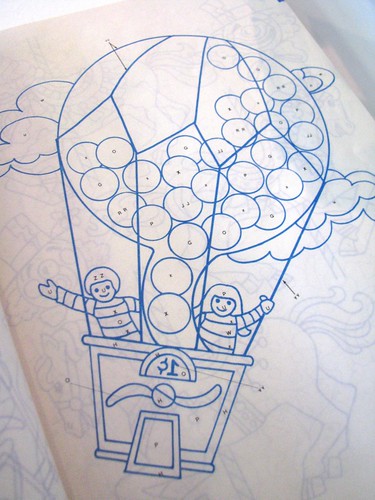
I love this hot-air-balloon-that's-really-a-gumball-machine.

Estate Sale find - embroidery transfer book

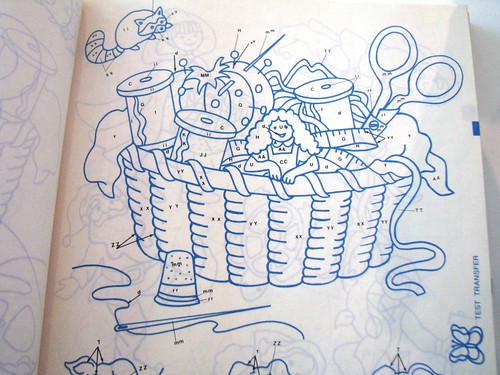
Who can resist this crafty basket? (or that wee raccoon above it)

Estate Sale find - embroidery transfer book

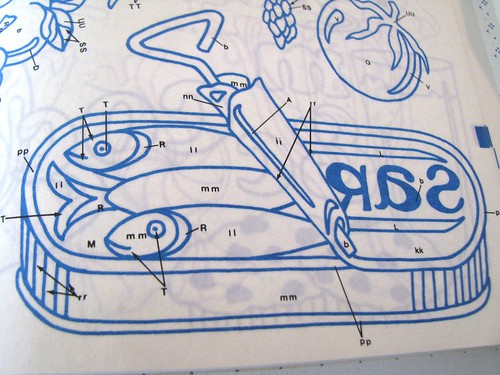
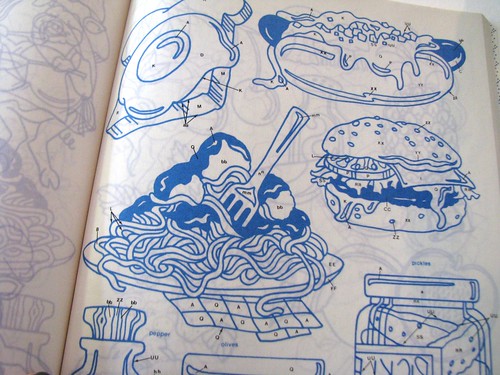
There are a lot of kooky food designs in this book. Because everyone wants to embroider sardines ...

Estate Sale find - embroidery transfer book

... and hot dogs with relish.

Estate Sale find - embroidery transfer book

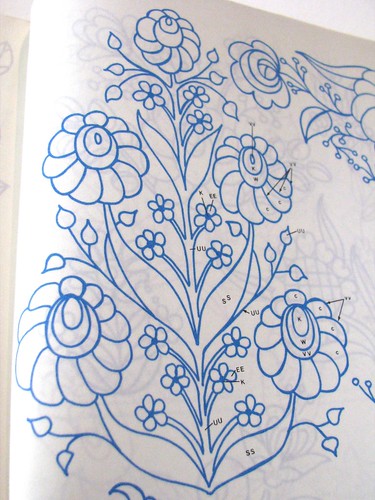
After copious amounts of country kitchen designs, the book wraps up with pages and pages of really lovely floral designs that would be beautiful if worked in crewel or punch needle. I'm so glad my daughter convinced me to look through this book. In the end, I think I got it for less than a dollar, and have found it hugely inspiring and fun to flip through. I haven't tried ironing on any of the designs yet, but I have used my light box to transfer one and use it for punch needle embroidery (something I'll be sharing soon). Go grab a copy off Amazon and enjoy for yourself. You can also see a few more samples of the designs over on my Flickr set. More vintage craft/embroidery finds soon!

Friday, October 28, 2011

Today is the First Ever World Wide Space-O-Lantern Carving Day!

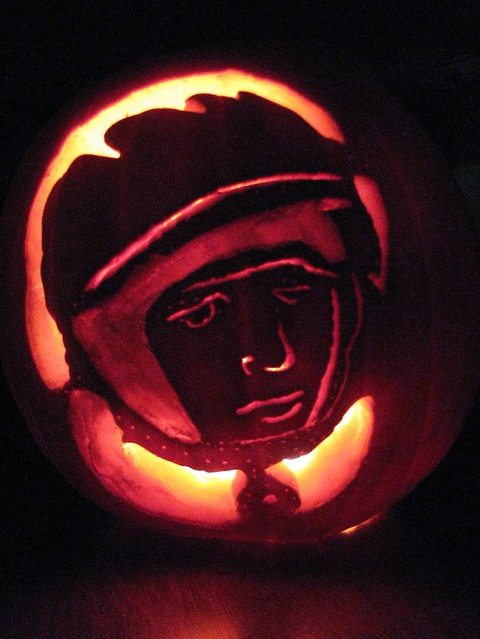
Yuri Gagarkin - Space-O-Lantern
A Yuri Gagarin Space-O-Lantern (I call him, Gagarkin) by me, Rachel Hobson. 

That's me with the knife and crazed look in my zombie eyes ... Ahhh ... college days. 

Y'all already know that I'm a massive space geek, but what you might not know about me is that I'm also a huge, HUGE fan of carving pumpkins. Ever since I was a little kid, one of my very favorite parts of Halloween was carving jack-o-lanterns. I was always in charge of scooping out the pumpkin guts, because not only did I not mind manhandling the slimy innards of a pumpkin, I relished it. In college, my friends and I would have pumpkin carving parties that were great fun. We'd line our jack-o-lanterns up at the end of the party and get a great picture of them all lit and ready for the front porch.

STS-120
Awesome STS-120 Space-O-Lantern, carved by Liz Warren

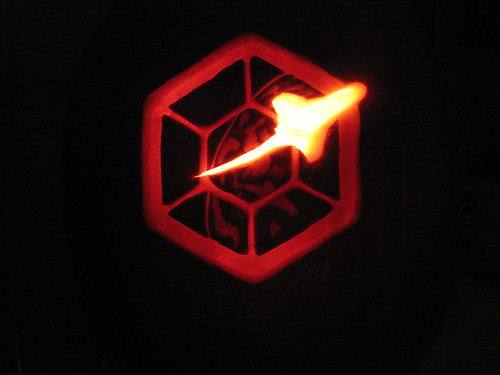
A while back, fellow Space Tweep and brilliant scientist for the International Space Station, Liz Warren (aka - @spasmunkey) posted pictures of the amazing space-o-lanterns she's been carving for ages. Most replicate the patches of various shuttle and ISS missions, and they are all spectacular. She's even posted a time-lapse of a pumpkin-in-process. From the first time I saw them, I joked with Liz that we needed to host a Space-O-Lantern carving party where we could get our space geek friends together and carve pumpkins with space-y images. Last week, we did just that. A small group of Space Tweep friends came over to my house and we spread out in the studio and carved the geekiest, most awesome space-o-lanterns you could ever hope to see. It was a total blast. At the end of the party, we lined the space-o-lanterns up outside and photographed them like we were nerdy paparazzi. We then rolled the telescope out on to the back deck and looked at the moons and stripes of Jupiter. It. Was. Awesome.

Wow! The pumpkins all lit up look awesome!
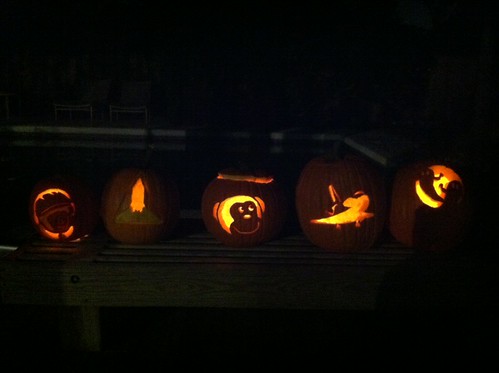
Our line up of Space-O-Lanterns: L to R Yuri GagarKin (by Rachel Hobson), Space Shuttle Tribute (by Robert Pearlman), Timmy from Think Geek (by Liz Warren), Space Shuttle landing (by Carl Carruthers), Ghosts - we like to think they are space-y ghosts! (by Sheila) Thanks to our carving cheerleader extraordinaire, Cindy, for taking pictures and live-tweeting the event! 
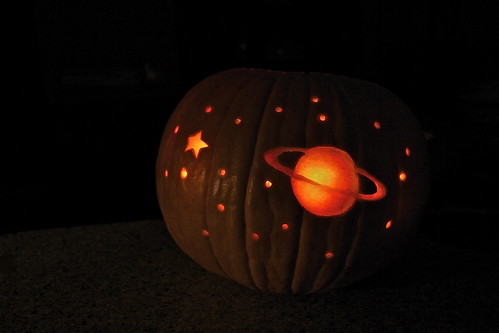
A few days later, we joked on Twitter that there should be a World-Wide Space-O-Lantern Carving Day and decided that we didn't even need to wait until next year to start it. So here we are. The First Ever World-Wide Space-O-Lantern Carving Day, October 28, 2011. What does that mean? Today is a day to carve - on your own or with friends - a pumpkin with some kind of space themed image. Rockets, shuttles, planets - you name it. Anything that celebrates space exploration goes. At our Space-O-Lantern carving party, we had shuttle pumpkins, a Wernher von Braun pumpkin, a Timmy (Think Geek) pumpkin and a Yuri Gagarin pumpkin (or Gagarkin, as I liked to call him).

STS-130
Awesome STS-130 Space-O-Lantern by Liz Warren 

Call your friends and set up a Space-O-Lantern carving party. Share ideas for space-y images and get carving. Share telescopes and look to the skies for even more inspiration. Live-tweet your carving parties with the hashtag #SpaceOLantern. When you've carved your Space-O-Lanterns, be sure to add them to the Space-O-Lantern Flickr group. From here on out, the last Friday before Halloween will now be known as World-Wide Space-O-Lantern Carving Day, so start planning your carving parties now! Next year, I'm totally making a Hubblekin.

Space Pumpkin
Awesome planetary Space-O-Lantern by Jen Scheer

Monday, October 24, 2011

How-To: Make a Pikachu Pumpkin

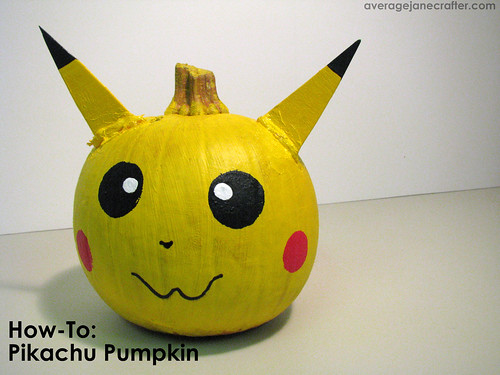
How-To: Make a Pikachu Pumpkin Last week, my son had a school assignment to decorate a pumpkin as his favorite character from a book.  Of course, the book he picked was a Pokemon one, and the character he chose was Pikachu. Despite both of my kids having been Pokemon fanatics for a couple of years now, I still haven't quite gotten all the lingo, characters and story lines sorted out, but I do think this yellow "electric type" is a cutie and was excited to see him transformed into a pumpkin.

My son was adamant that he had to do "ALL THE WORK," and for the most part he did. Shortly after starting, we both realized that Pikachu was turning out to be pretty awesome so we decided we'd share the process here with you. It's pretty straightforward, but hopefully you'll see how easy it is to transform a pumpkin into a Pikachu and will want to jump in before Halloween.

We used a small round pumpkin, and since the kids weren't allowed to carve the designs (gooey pumpkin guts on the display in the library would be ... not so awesome) we knew paint was the perfect medium.

How-To: Make a Pikachu Pumpkin Supplies 

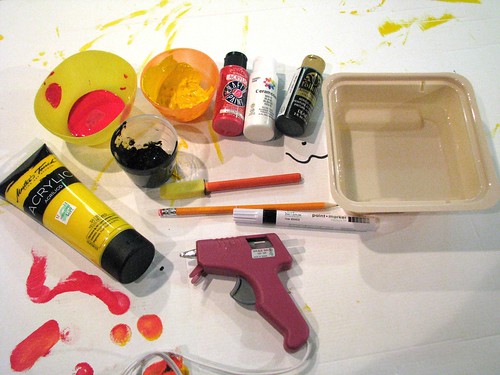
Supplies:

  • 1 small round pumpkin
  • Acrylic paint in bright yellow, red, white and black
  • 1 fine line black paint pen (a Sharpie might work as well, but we happened to have a paint pen on hand)
  • Assorted sponge brushes (I found an assorted pack of brushes at Hobby Lobby for around $5-6. It included many sizes of rectangular brushes, as well as some round brushes that were perfect for making Pikachu's eyes and cheeks)
  • A pencil with a new, unused eraser
  • Cardstock or Mat Board
  • Hot Glue Gun
  • Assorted small plastic bowls (recycled applesauce containers are great!)

Pikachu Pumpkin - base coat
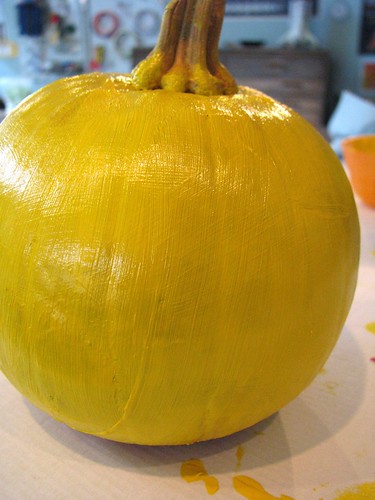
It took two or three layers of the yellow acrylic paint to really coat the pumpkin. We set up on a scrap piece of cardboard and let my son paint away. He played while each layer was drying & it didn't seem to take to long between coats.

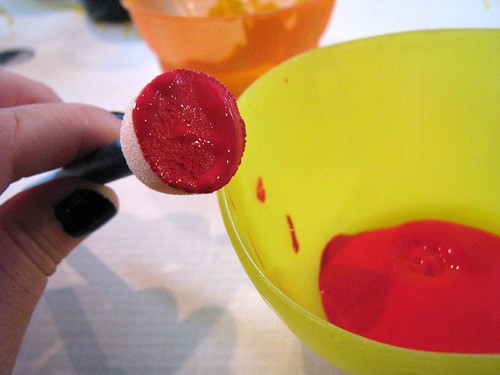
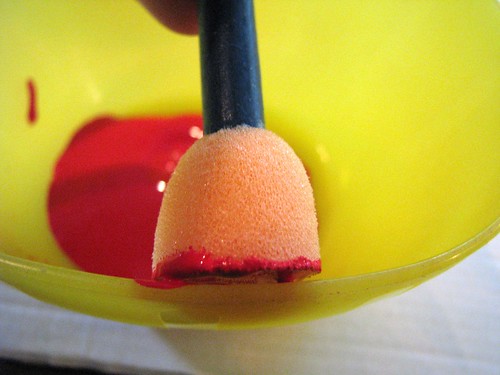
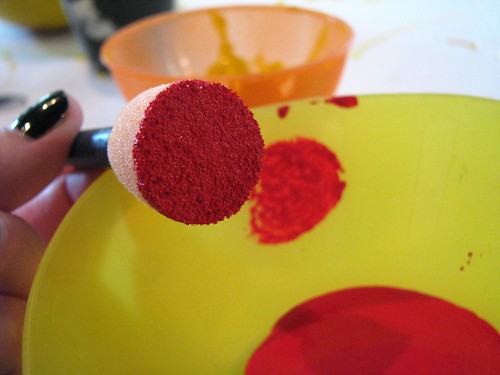
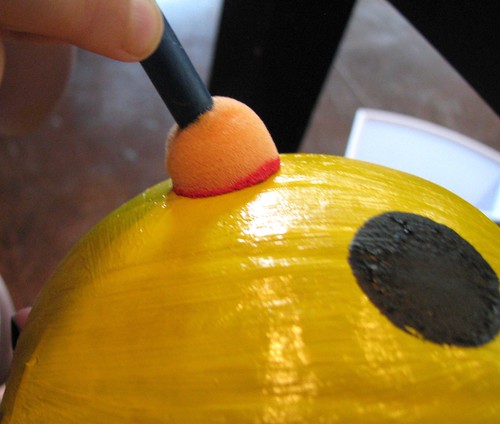
For the eyes and cheeks, we used the round sponge brushes. Put a small amount of paint into one of the small plastic bowls. Dip the brush in the bowl, then dab it against the side of the bowl to remove the excess paint and give it a light, even coating.
Pikachu Pumpkin - cheeks, loading brush
Pikachu Pumpkin - cheeks, dabbing the brush
Pikachu Pumpkin - cheeks circle brush dabbed
Pikachu Pumpkin - painting cheeks
Press the sponge brush straight down on the pumpkin and gently rock it around to make sure the entire circumference of the circle gets painted. We practiced a couple of times on the cardboard to get the motion down. My son quickly picked it up and was stoked to see the perfect circles he was able to create with the circle sponge brush.

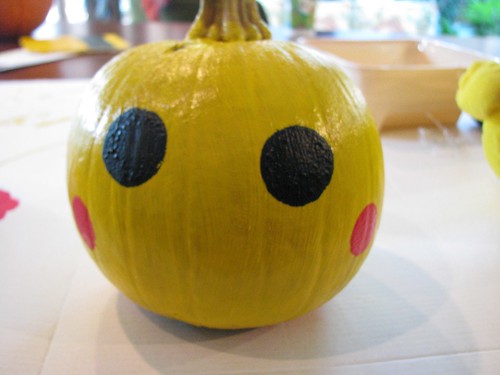
Pikachu Eyes & Cheeks
Place the eyes toward the center of the pumpkin, and the red cheeks just below and to the right and left of the eyes.

Pikachu Eyes
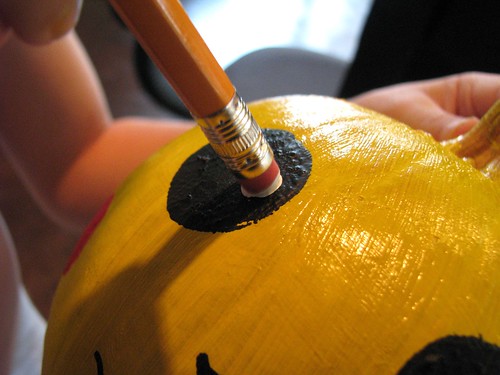
For the white portion of the eyes, use your new, unused pencil eraser and dab it in white acrylic paint. Use the same straight-down-rock-straight-up method to apply the white portion of Pikachu's eyes. Check pictures for placement (or, as we did, use a Pikachu stuffed animal as your reference)

I helped my son with the nose and mouth, because the lines are so fine. Matching the lines in your reference drawing (or stuffed animal) draw the small nose and wavy mouth.

Pikachu Pumpkin Ears
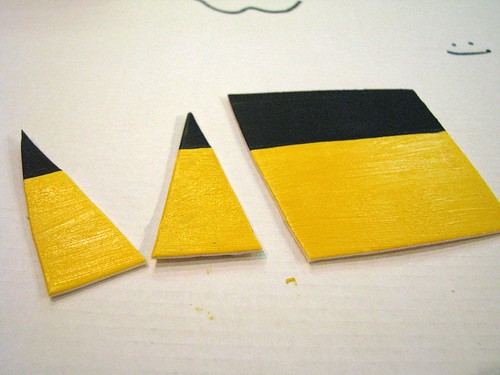
For the ears, paint a layer of yellow acrylic paint on mat board or heavy cardstock. Then paint a stripe of black across the top. Cut the elongated triangle shapes out to create the ears.

Pikachu Pumpkin - attaching the ears
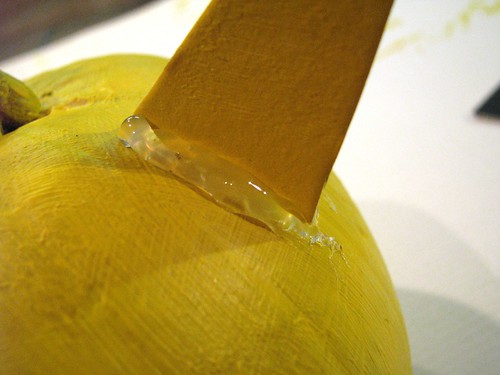
To attach the ears, hold them in place and surround each one with hot glue (this was the other time I helped my son so he wouldn't burn his fingers) Hold the ear in place while the glue dries enough to set up and support the ears. Once the glue is completely dry, paint the glue with the yellow acrylic paint to help it blend in to the pumpkin. Voila! Pikachu Pumpkin!

How-To: Make a Pikachu Pumpkin
My son was so excited to take his Pikachu Pumpkin with him to school this morning. We kept joking that he needed to carry it on his shoulder. And even though I'm not a diehard Poke-Parent, I could still deeply appreciate his enjoyment of turning a plain pumpkin into an awesome Pikachu.